Archive for the 'Homebrewing' Category

Going abroad, Mead, and Marathons

Posted by Nate in Family, Homebrewing, Travel.
Wednesday, October 18th, 2006 at 12:02 pm


Whoa.  Kind of a lot happened in the last few days, and lots more coming!

We just booked our tickets to visit my brother in Scotland and Karen’s brother in Ghana!  Going to be a whirlwind two-week trip in January…  Super exciting, I’ve been to England and Ireland but never Scotland, and definitely never Africa.

Early this morning I started a batch of mead that if all goes well will be used for the toast(s) at our wedding.  It uses cranberry honey and I threw in about 4# of frozen cranberries – the hope is the tartness will balance out any residual sweetness, and coupled with high carbonation it should be very champagne-like and delicious.  I didn’t chop or otherwise mess with the cranberries which may end up being a mistake, we’ll see how much flavor comes through in a few weeks and maybe I’ll add some more.  The guidelines I’m following say you can go up to 8#, so I’ve got some wiggle room…  Anyway, I’ve been stressing because time is getting short for aging and especially for all the work involved with the méthode champenoise.  (read here, scroll down a bit)  High hopes for this batch, fingers crossed!

Finally, we’re going to Chicago this weekend to cheer my sister on in her first marathon (and her b/f Freddie).  Whoa, indeed.  My knee is improving, but I’m still nowhere near jogging, let alone a freaking marathon!  So I can’t quite relate to that distance except that it seems really far…  Good luck, kids!

Basement progress!

Posted by Nate in Home Improvements, Homebrewing.
Monday, August 28th, 2006 at 11:01 pm


As I start this post, I can hear the nightly fireworks going off from the State Fair – all the way from St. Paul! Whoa. The bad news is I think I’ve heard them every night of the fair so far, which means I’ve been up later than I want for too many nights, now that Karen’s getting up at 5:15 again…

But I’ve been up late working on the basement! Yesterday I hung the remaining pieces of drywall (after figuring out the spacing for the door) and started to mud it. Man, that sucks. I’ve done it before, long ago, but it wasn’t my project – I think it was a garage, or work area – and it didn’t have to be good. This one I want to be good. I’m taking my time, doing 3 or 4 layers in all, but tonight I wanted to just forget about it. It kept "chunking up" on me on certain corners (and it’s almost all corners!!) and I couldn’t figure out why. Ah well. I pressed through it (literally) and got it close enough, I figure I’ll clean it up with a sponge tomorrow morning. That was my day today, and probably for the next two: get up, sponge down the joint compound mistakes, go to work, run errands, come home, and put another layer on. The good news is the flat runs on the walls are looking good, and if anybody’s looking too hard in the corners the room has already failed!

Tonight I needed another project after mudding, so I picked up the hardware for the two doors I’m going to hang and tackled the first one. Yesterday I’d leveled and screwed in the interior pieces of the door frame, and today got the reward for the tedium: it hangs perfectly! No swing at all, it moves wonderfully, and falls right into the latch. Awesome. Only problem (which we’d anticipated, but thought we could work around) is that it doesn’t open all the way around before banging into the main house support beam. Ah well. I anticipated it so much I made sure to get hinges with a removable pin so we could just take the door out if needed. So good progress! My goal is to try to get the mudding done and at least prime the walls and hang the doors before the Chicago kids arrive for the State Fair. We’ll see how that goes…

Oh yeah, and I’ve got a million things fermenting in the basement. Sweeeeeet.

Parents in town!

Posted by Nate in Bruno, Family, Homebrewing.
Sunday, May 7th, 2006 at 6:29 pm


Karen and I were lucky enough to arrange a 10-day visit with my parents, who arrived Friday the 5th and will stay through the 15th. We had a hectic weekend planned, followed by a hectic week…

Saturday first thing we hit the local Farmers’ Market – no veggies on sale yet, but we got some good cheese and bread "for the party". (or for us ;) Next off to the Living Green Expo where we attended a workshop on rain gardens – that’s right, Karen’s getting her rain garden. Today we started work on the rain garden, went to the May Day festivities at Powderhorn Park (where Nate had a minor meltdown), came home and finished the work, then ate at Pizza Luce. Yum. (I’ll leave it to Karen to post about the rain garden)

I spent a few hours each night working on the Kegenator – I had to add three new taps, keg 2 new beers and some sparkling water, and add on to the CO2 manifold for two of the three pressures I was running.

Then it was unveiled – the coolest birthday present ever: The Kegenator was officially done!! Thanks, mom and Quentin, for the best sign I can imagine!!!

Kegerator inauguration

Posted by Nate in Homebrewing, Projects.
Sunday, February 26th, 2006 at 8:59 pm


Time for an update, and lots more pictures. At left is the trial run to see if my measurements were right and I can actually fit (at least) 8 kegs in this thing – no problem. And I’ve still got the whole compressor shelf which could hold two more or three if I try. Whoa.

The remaining parts came last week, I think Thursday, so that night was spend knocking together the gas fixtures and manifolds on the back of the rig. You can see (from right to left) the 10# CO2 tank and primary regulator set at 24 psi. At 40 degrees F, 24 psi will give me 3.5 volumes of CO2 in solution – just right for soda and highly carbonated hefeweizens. This pressure is fed into a double manifold so I can drop it inside and also use an external line to force-carbonate kegs or 2-liter bottles by shaking. This double regulator passes the 24 psi right into two secondary (low pressure) regulators, one set at about 14 psi and one at 8 – this will give me nice pressure for standard ales and low carb british and scottish ales. All of these lines pass into the kegerator as you can see at left – from left to right we have high pressure, medium, and low. The nice thing with the manifolds is they’re pretty easy to extend when I need to add more gas lines for the rest of the kegs. They also include check-valves, which prevent liquid from flowing back into the regulators if I ever attach a high pressure keg to a low pressure line.

Finally we’re at the keg itself, with two quick disconnects feeding CO2 and drawing beer, from left to right. I’m using 3/16 interior diameter beer line for increased resistance – I still need about 5 feet to drop the pressure enough for a good pour. If that’s confusing, just think about shooting beer at 12 psi into a glass – it would explode in foam. The long tube length applies increased pressure over distance, allowing the beer to reach equilibrium before it exits the faucent. There are a lot of crazy formulas to calculate line length based on temperature and serving pressure – my 24 psi lines are going to be a coil about 25 feet long!

Lastly the glorious exit. The stainless steel shanks bore through the foam and wood and connect right into stainless steel faucets. They’re more expensive than chrome, but they won’t chip or corrode over time with the acidity of the beer. I don’t have any cool tap handles yet, but there is a screw-in insert that matches the tap thread which will let me make my own someday, so I might go that route. In the meantime probably pick up some dirt cheap plastic ones.

What’s on tap? So far just an American amber ale, and a keg full of water for experimenting with a few soda recipes. No gas leaks yet, everything is holding pressure well, and I couldn’t be happier with the results so far. Now I just need the in-progress beer batches to hurry up and finish so I can keg them!!

Oh yeah, it’s called the Kegenator. Word.

Kegerator, yo.

Posted by Nate in Homebrewing, Projects.
Monday, February 13th, 2006 at 9:50 pm


So remember when I got that big chest freezer from Karen’s parents? And how I had been dreaming since day one about building a kegerator? Well, today those dreams took a huge step towards becoming real… 
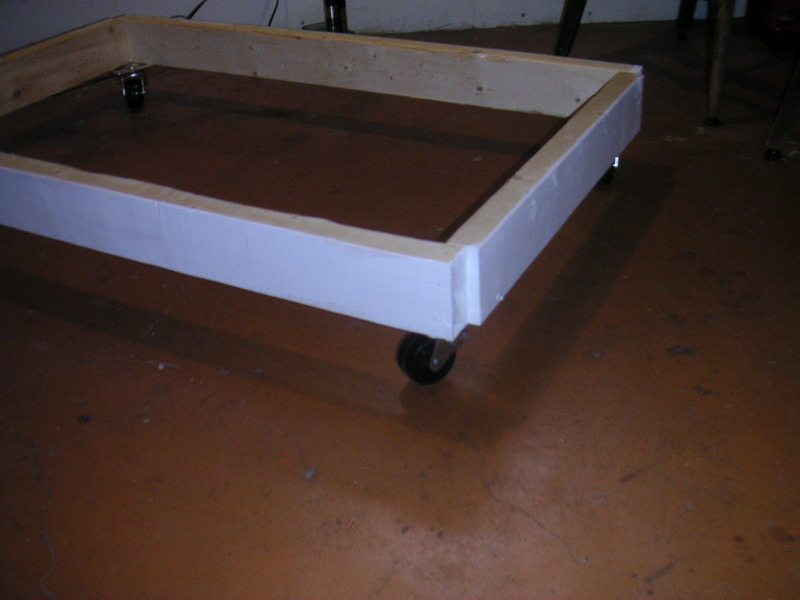
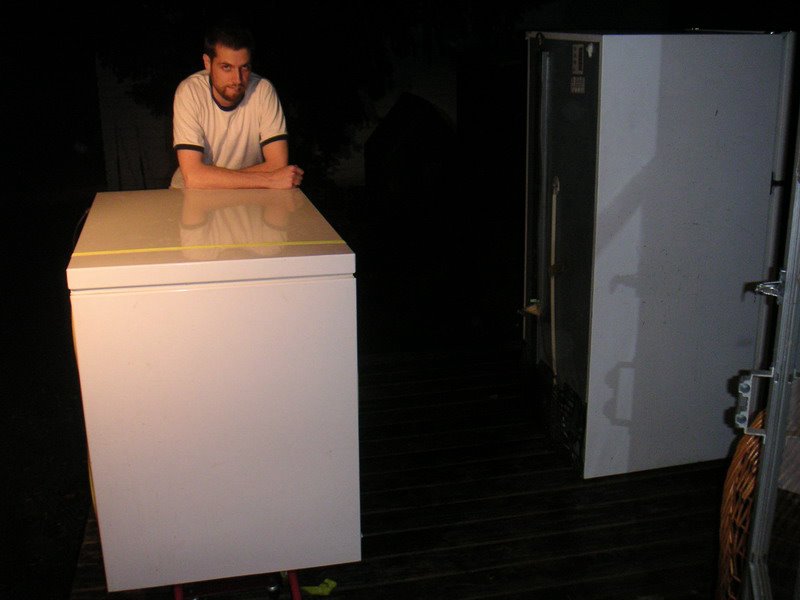
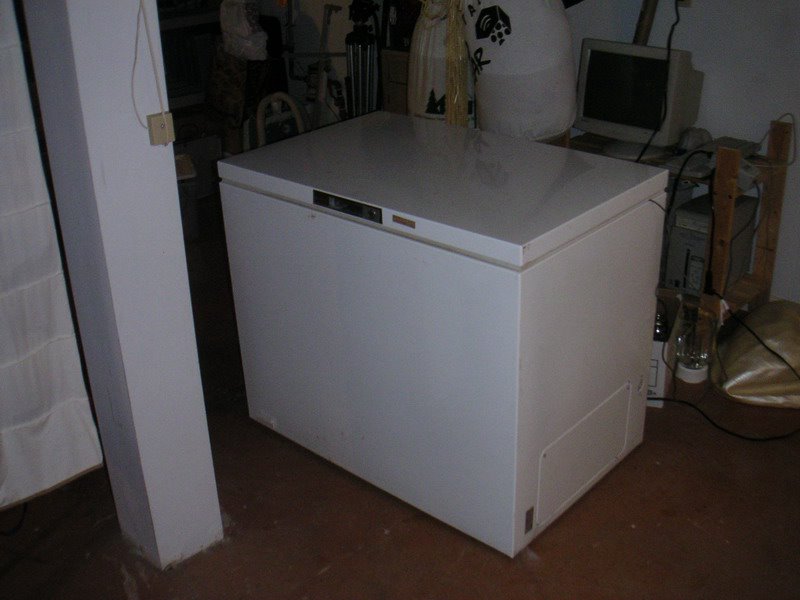
At left is the freezer in the "before" state. The wire running into the side is for the temperature controller that lets me peg whatever temp I want inside. The pic on the right is the first step: getting it on wheels. You can see the whacky corner – an inauspicious start to the project. I wrote down a 3 and added a 2, so the long boards ended up an inch short. I didn’t want to go get any more lumber if I could help it, so I used a bit more glue and an angle on the screws and called it good. Really shouldn’t be that much sideways pressure applied to those joints, and in the final product the cosmetic bit won’t be seen. Primed with Killz2 latex, sealed with an untinted outdoor gloss, and good to go.

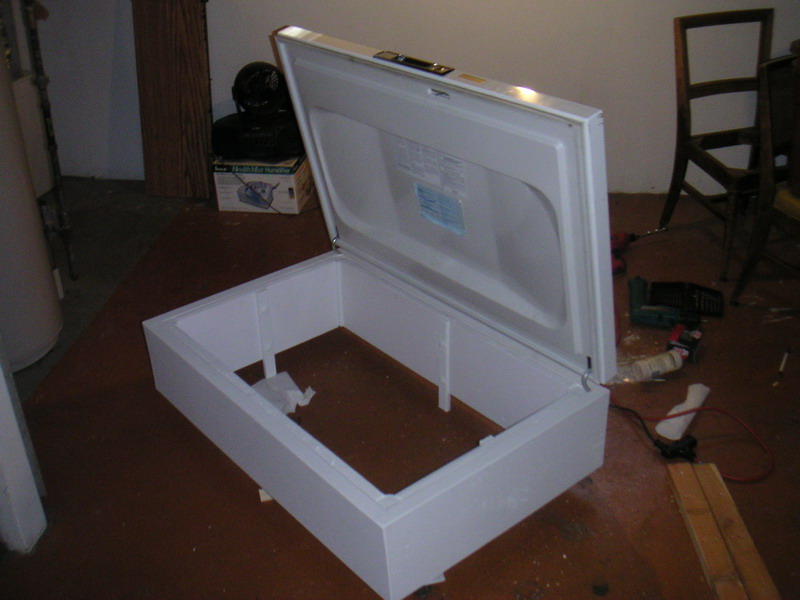
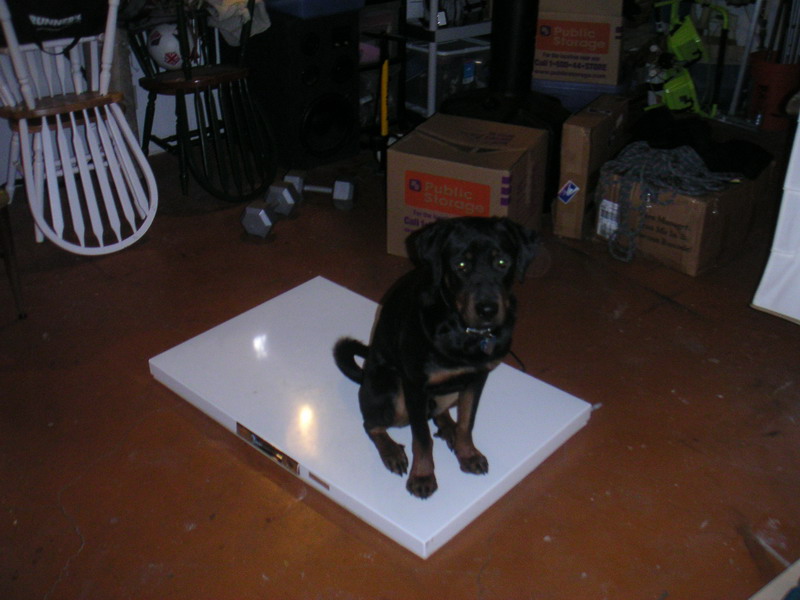
As soon as I got the lid off the freezer, Mr. Helpy McHelperson decided to sit on it. And he wouldn’t get off, even as I started laying in the mitered edges of the collar for the lid… (PS, mitered cuts are really hard to make well with just a circular hand saw. 
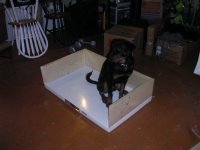
I measured every line from one perpendicular end and used a fence to make the cuts, and still ended up about 1/8" off on 3 of the 8 edges… Not unfixable, but not what I wanted.)

Next time I would come up with a better method for the framing process. 
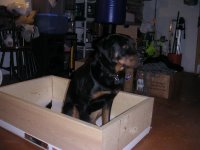
I decided (probably unnecessarily) I didn’t want screw holes on the outside of the wood (staining was still a possibility at this point), so I was going to frame from the inside with 2×2 sticks in the corners. Solid and a good idea, but it proved really difficult to keep things square and level while applying the pressure needed to screw everything together. Maybe next time I’ll tie in the 2×2 to one side first, but it seemed hard to know exactly where to seat it so the miter would be right. Hmm.

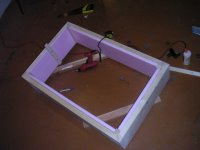
Realizing the insulative properties of wood aren’t so hot, I used 1" foamular insulation board, with an R-value of 5. Plain 2x lumber has about 1.8, so the foam will make a big difference in keeping the freezer cold… I also wanted a way to keep the collar in place on the freezer without screwing into anything on the freezer, so I got a few big washers and drilled holes in some 1×2 to pull through the insulation and adjust the spacing on the sides. You can see the first board on the right, the rest were added while it was sitting on the freezer in order to get spacing right. In the end a good tight fit, really solid when in place.

The last thing before painting was caulk – I sealed every joint, exposed board end, and all the screw heads and washers. Once it was dry (this was spread over a few days) I hit it with two coats of primer and sealed it with the same gloss finish.

Finally it was time to fit the lid. (In retrospect I should have used the existing lid holes to keep things in place instead of the elaborate 1×2 down the side method. Next time.) After a few trial and error sizing and depth tests I had a very good fit for the hinges on the lid – it swung and balanced correctly. I had to trim and re-caulk the top edges of the 1x2s since it hit the inside of the lid at first, but that was it for this step.

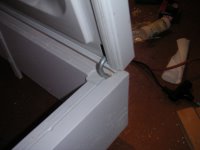
At left is a closeup of the hinge setup. I may need some more sealant around there eventually, we’ll see. Lastly, before I set the whole thing in place I put some weatherstripping on the bottom edge to get a good seal. The top used to be a magnetic seal, now it’s just gravity – and once it was in its final position I could see a few gaps. Some more caulk, some more paint, and some more waiting and I finally had a solid seal around the lid. 
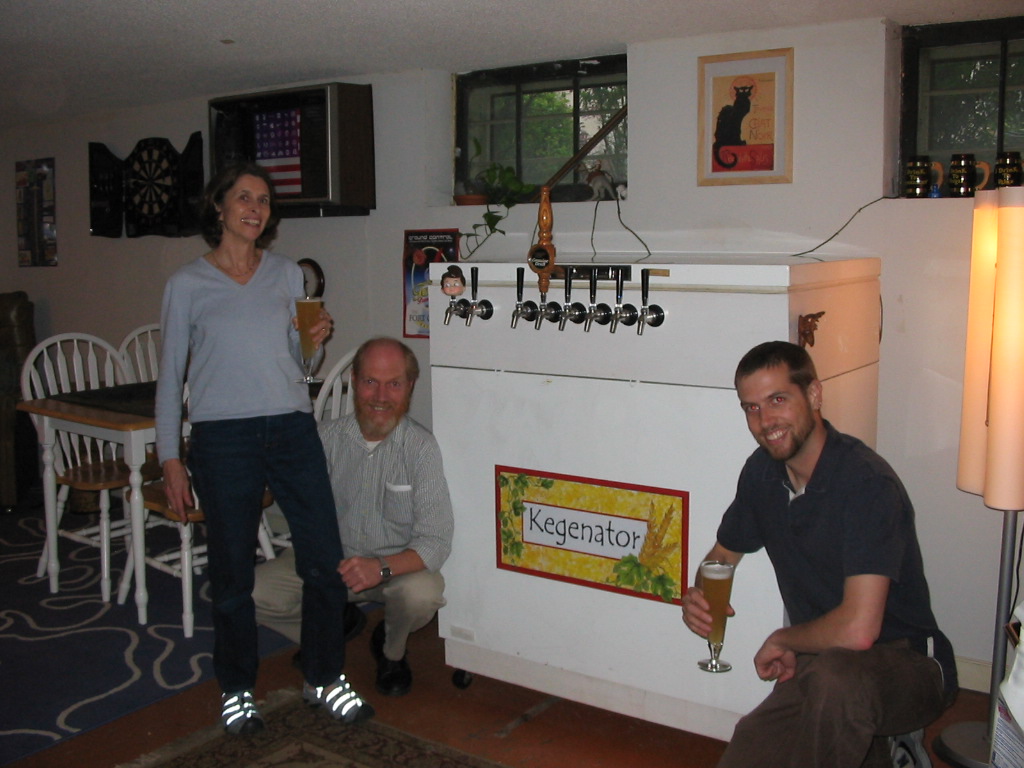
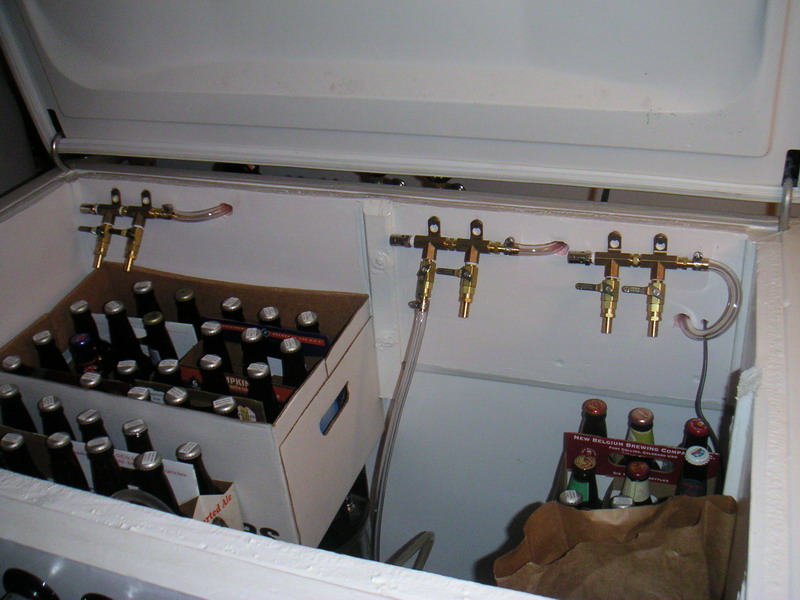
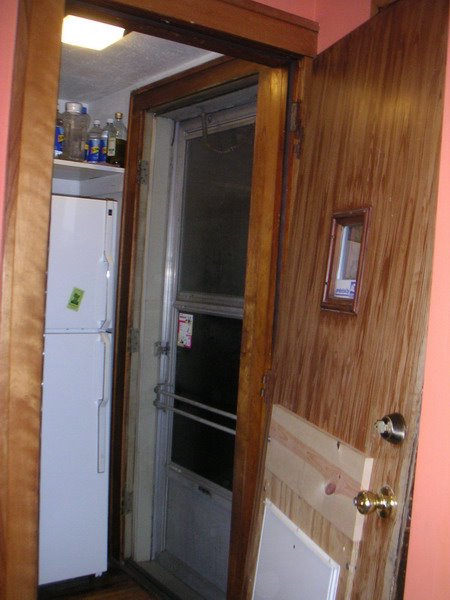
At right is final product – missing, of course, all the faucets! I just today placed the orders for the rest of the gear – the kegs should be here on the 16th, and the gas and liquid equipment soon after. Done deal! The kegerator conversion is well underway, and it’s all totally removable in case we ever need a regular freezer back. So sweet already, and stay tuned for updates: it’s only going to get more awesome!!!

Homebrew 101

Posted by Nate in Homebrewing.
Tuesday, January 31st, 2006 at 8:06 pm


Laurel recently asked:

This may sound like a dumb question, but what does 1.047 OG mean???

Well, I’m glad you asked. OG, as everyone knows, is short for Original Gangsta. 1.047 OG means that a beer has an Original Gangsta rating of 47, which is sort of around Vanilla Ice — not that strong. Make sense? Good.

Ok, really, here’s the deal: OG in this context means Original Gravity, with "gravity" being the density of a liquid – in this case unfermented beer, or "wort". John Palmer defines it thus in his homebrew glossary:

Gravity – Like density, gravity describes the concentration of malt sugar in the wort. The specific gravity of water is 1.000 at 59F. Typical beer worts range from 1.035 – 1.055 before fermentation (Original Gravity).

So maybe 1.047 isn’t so bad (it’s not), but all the really kickin’ beers come in at 1.060 or more, with some strong ones hitting over 1.100! But that’s a lot of grain for a five gallon batch – my current system I think will max out at about 1.080… (Time for more gear!!) Anyway, by measuring the OG and the FG (Final Gravity), it’s easy to compute how much sugar has turned into alcohol, and how strong a beer you’ve brewed. High OG beers are commonly referred to as "big beers", and lower OG beers as "small".

For all of you considering getting into homebrew, realize there are many levels of the hobby – the simplest is really just that: simple. Here’s a basic equipment list, and a crash course in extract brewing. More fun cannot be had!

New Brew and Project: Kitchen Faucet

Posted by Nate in Home Improvements, Homebrewing.
Saturday, January 28th, 2006 at 8:27 pm


So I’m launching into a new era of brewing: I’ve been doing all grain (i.e. "from scratch") brewing for almost a year now, and I’m about to order some kegs and a gas canister for the kegerator. I’ve also started ramping up production again after a big lull due to the move, dog, grad school, etc… Tonight was the first brew of the series, a delicious American Amber Ale with Wyeast 1056. It’s a smaller beer, coming in at 1.047 OG, but it’s perfect because when I brew the big (1.073) Rye IPA next weekend I’ll have all that good yeast to rack onto and the beer should ferment like a rockstar. I also made a yeast starter today for a Biere de Mars I’m brewing tomorrow – pretty big as well, hence the starter. That one I plan to ferment with Wyeast’s Ardennes yeast til it’s almost done and then rack onto their Roeselare Blend, hopefully to give it that crazy hint of sour and "something" that it should have. A decent brew day, all said.

… But in my standard procedure, I cool the wort with an immersion chiller – cold water running through a copper coil set into the hot wort. This means changing out the faucent adaptor on the kitchen sink, usually a pretty lightweight process. Tonight I decided, you know, while I’m in there, I might as well tighten this thing down a bit and stop the leak we’ve been getting through our water filter. I’ll just grab these pliers and give it a good tu… crap. It’s a stupid metal thread set over a stupid plastic nub, and I just broke the metal. So… Looks like I’ll be hitting the Home Depot tomorrow for a new faucet. Stupid everything.

Pinolera reporting from Duo Team HQ

Posted by homebrewer in Family, Homebrewing.
Monday, January 16th, 2006 at 8:56 pm


LOVE FROM THE MALL OF AMERICA

I am very excited to have this opportunity for a guest entry on Duo Team’s awesome blog!! This is your friend the Pinolera, I have left my tropical climate to come and spend the winter in the extreme cold of the midwest in Minneapolis! In addition to all the winter fun (broom ball, ice skating, snowball fights, donuts in the parking lot, hot chocolate, coffee and baileys, freshly fallen snow, watching nate and karen shovel the side walk, and catching snow flakes on my tongue) we have also enjoyed lots of indoor activities. We visited the mall of america and camp snoopy. We rode 2 indoor world famous roller coasters and the ghost blasters ride (ratings as follows – peter: 683, karen: 600, nate: 572, sierra 500 . . . i had to go easy on them since i am a guest!). And last but not least, i sampled some more of what the midwest is famous for . . . ROUND FRIED THINGS!!!

NO YOU CANT HAVE THE LAST DEEP FRIED OREO!!

Yes, in preparation for the (in)famous MN state fair i tried a plate of deep fried oreos. I loved eating it at the time, but later i had a stomach ache. So much for my new year’s resolution to lose 15 pounds!! We have also visited pretty much every brew pub in the twincities and i have tried the most delicious selection of beers ever! There has been a pretty serious shuffle puck evening as well as some air hockey and bowling. Highlights of the game night for me include: accepting a bet to go hit on a group of mexicans, resulting in 10 minute boyfriend enrique and becoming famous for my final puck fury in shuffle board! I haven’t even mentioned my guest suite (AWESOME!!!) or the day i joined the 21st century (got new credit card, bought a cellphone, laptop computer, scanner/color printer, maxed out new credit card . . .yes, all in one day!) but i think it is time to get to one of my most valuable experiences here at Duo Team Headquaters.

DRINKING BEER AND MAKING BEER AT THE SAME TIME!!!

Yes, we are brewing a Loft clone, here we are measuring out the hops. I have some experience in amateur wine making, but this was taking it to a whole new level. Stay tuned for the "Summer?*&%?#@ Winter?"

YEP!! IT’S FREAKING "SUMMER?*&%$#!@WINTER?"

This is a pretty powerful schroeder team combo, brewing up our own killer beer! Watch out usa!! I am already sad to leave, i really like the town and have had nothing but a complete and total BLAST here! Que Viva Minneapolis!!

It’s beginning to look a lot like…

Posted by Nate in Homebrewing.
Tuesday, November 29th, 2005 at 9:52 pm


Ahh, beer. Four cases of beer. (I know you can see some empties there, but there are a few bombers and swing-tops out of sight that make up the difference.) That’s about 10 gallons of deliciousness. Two cases of a jalapeno cream ale and two of an experimental apple/caramel/cinnamon Belgian Dubbel. Holy night, indeed!

Chest Freezer!

Posted by Nate in Homebrewing, Projects.
Sunday, October 30th, 2005 at 9:03 pm


Since I started homebrewing (Feb 04) I’ve been nursing a dream of kegging the beer and having numerous brews on tap at any given moment. Today that dream took a huge step forward…

Karen’s parents were nice enough to drive out their old chest freezer after they ended up not needing it any more. It’s been sitting in the garage for almost 2 weeks and finally tonight we decided to get it in the basement – no easy task on its own, but especially difficult given our kitchen and stairs layout. The back door gives the only straight shot into the basement, and the back door won’t open all the way because the existing fridge blocks it. So in this case two things had to happen – get the door of its hinges (need those extra two inches) and get the fridge outside to make enough room for the freezer coming in. (on the left you can see the door off the hinges and the fridge in the way)

Also had to empty the fridge before moving it. And clean it while it was empty. You know.

The fridge halfway out the door. Ended up being easier to just muscle it out the door than wedge a dolly in there.

Eww. I don’t think anyone’s cleaned under the fridge in a long time…

Whew. Break time. Got the freezer up on the deck with the fridge. Now to get the freezer in the door (1/2" to spare) and down the stairs (same clearance). Let’s just say that Karen is very strong and we make an awesome (duo) team.

Ta da!! I plugged it into my temperature controller and it’s just pegged 45 degrees — time to fill it with beer! (bottles for now, kegs soon)