Archive for the 'Home Improvements' Category

New Brew and Project: Kitchen Faucet

Posted by Nate in Home Improvements, Homebrewing.
Saturday, January 28th, 2006 at 8:27 pm


So I’m launching into a new era of brewing: I’ve been doing all grain (i.e. "from scratch") brewing for almost a year now, and I’m about to order some kegs and a gas canister for the kegerator. I’ve also started ramping up production again after a big lull due to the move, dog, grad school, etc… Tonight was the first brew of the series, a delicious American Amber Ale with Wyeast 1056. It’s a smaller beer, coming in at 1.047 OG, but it’s perfect because when I brew the big (1.073) Rye IPA next weekend I’ll have all that good yeast to rack onto and the beer should ferment like a rockstar. I also made a yeast starter today for a Biere de Mars I’m brewing tomorrow – pretty big as well, hence the starter. That one I plan to ferment with Wyeast’s Ardennes yeast til it’s almost done and then rack onto their Roeselare Blend, hopefully to give it that crazy hint of sour and "something" that it should have. A decent brew day, all said.

… But in my standard procedure, I cool the wort with an immersion chiller – cold water running through a copper coil set into the hot wort. This means changing out the faucent adaptor on the kitchen sink, usually a pretty lightweight process. Tonight I decided, you know, while I’m in there, I might as well tighten this thing down a bit and stop the leak we’ve been getting through our water filter. I’ll just grab these pliers and give it a good tu… crap. It’s a stupid metal thread set over a stupid plastic nub, and I just broke the metal. So… Looks like I’ll be hitting the Home Depot tomorrow for a new faucet. Stupid everything.
Graffiti, kitchen before and after

Posted by Nate in Day to Day, Family, Home Improvements.
Tuesday, December 13th, 2005 at 9:58 pm


So maybe that’s the point of this blog right now, to be the ballast in an otherwise confusing, hard, and painful world. Because, despite all the bitching we do about finals, work, and house projects, our life is a delicious slice of cake, devoured at our leisure, with all the good and such a tiny sprinkle of the bad it’s like it doesn’t exist. Where do I get off moaning about having to repaint our kitchen??? Still, that’s where things are right now. Maybe it’s our little struggles that help balance out the big ones, and in case it turns into the opposite I’m not going to sit here and wait for it. Luck, fate, or karma, I think the lesson from all those links above is to pay attention and BE in the moment you are in, with the people you love. That’s worth shooting for.

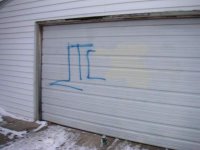
SO! On with the petty(ish) posts! Last night, in the limited time after I’d gotten home from work and Karen got home from her work, we were hit with some gang graffiti on our garage door. On the left is a shot I barely remembered to take halfway through covering it up. That paint, by the way, came with the house, marked as "garage trim". No, it’s not.

Anyway, it’s our first graffiti hit, surely not the last, although after a fair bit of research today I feel confident that the Sur 13 gang is most likely the only one to ever hit us, and they stick to blue. So, if we copy the wise advice of our neighbor Don, we will paint our door a dark color with some high sheen and be good to go. Worth a try, and anyway it needs something that matches. (incidentally, check out The Subconscious Art of Graffiti Removal. Start here, and check out the video. There’s a piece up the alley that’s been covered in the exact shape as the original – what’s the point then?)

So that was frustrating for a minute, but really just a belated "Welcome to Ward 9!" present. Now we’re really residents.

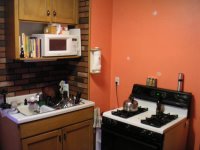
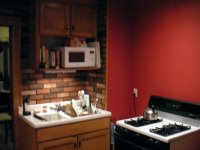
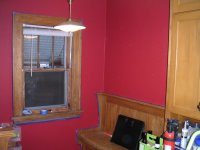
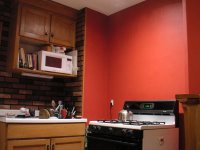
Finally, on seeing the red paint in the kitchen, a fellow blogger was heard to remark – "Isn’t that the same color it was?" To which I say, "no." A thousand times, "no." It was sickly orange. Ok, the orange worked originally, but not with our stuff. Check it out: before (left) and after (right). So. Cool.

You all be good and take care of yourselves and each other. I mean it!!!

Second verse, same as the first

Posted by Nate in Home Improvements.
Saturday, December 10th, 2005 at 11:55 am


I think one of the qualities that makes me good at my job (if I do say so myself) is my attention to detail. Often, in programming, there are two ways to solve a problem: 1) a solid, quick, and obvious way that will work well, and 2) an equally solid way that is not nearly as quick but has been thoroughly thought through and (hopefully) addresses all options and variables. Usually both methods will yield favorable results – at least at first. Over time, code written using method 2 will start to outshine method 1 code. As applications evolve and users start pushing them in directions you never intended, the more deliberate code will generally hold up to more abuse, require less maintenance, and perform better.

It’s sometimes the case that there’s clearly a right way solve a problem, but I can’t find it, so I keep going down the method 1 path, until suddenly I see the right way. And even though I’m almost done – the code works as it is – I can’t finish it like that. I have to go back and make it right. That may sound weird to non-programmers, but you know what I mean? A lot of people don’t realize there’s a huge creative side to programming, beyond the problem solving and grunt work of simple code. It’s a great feeling, but it can generate lots of extra work.

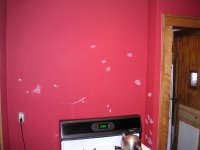
Which leads me to today. I started off with a small brush and some red to touch up the edges that were bugging me, and as I got close to the paint I noticed what looked like a white dust on it. I’d noticed it before but was sure I could just wipe it off, and never paid it much mind. This time, despite good rubbing with a damp washcloth, failed to remove most of the "dust". Looking closer, some of it was reflective, possibly insulation or plaster?? I really don’t know. I didn’t put the recessed light in until at least a week after painting, so I really doubt that was it, but…? Maybe the fan that I had on to help it dry was stirring up some old dust from the first light and skylight?? No idea. But there it was, and now I noticed it I couldn’t stop obsessing over it. A test patch with some fresh paint showed it covered the dust and looked (to me) noticeably better.

I read up a bit on Ralph Lauren paints, the reds in particular, and while nobody mentioned flecks of dust, a few people recommended sanding between coats to help it stick properly. (something in the red pigment, I guess) I also took a closer look at a few gouges in the wall I hadn’t noticed until the light was so much better, and a few lumps and bumps that snuck by the first time. And… I decided to do it right.

I have a long weekend ahead of me…

Garage doors, volume 1

Posted by Nate in Day to Day, Home Improvements.
Tuesday, December 6th, 2005 at 9:39 pm


Score: Doors 2, Duo Team 1.

Our garage doors hate winter. (I wonder why?) The main car door has started to jump its tracks – no real surprise as the garage is getting old and the cold / heat has started greatly influencing its shape. The tracks seem to have spread and the door just can’t quite meet the new width. But beyond that, even when I’m manually holding the jumped section in place, it will often act like it’s hit something and reverse itself at about 1′ from closing. And our in-car remotes won’t work again until it’s fully re-opened, a full 10 seconds at least. Worse than that, it seems to be totally beyond help from the car remotes, you have to get out into the garage where you can use the wall-mounted control to stop it as soon as it reverses, un-reverse it, and continue (if you’re lucky and it worked) on your merry way. This can slow down your morning by a whole 2 or 3 minutes. I know. Agony.

And the people door has started acting up too – the deadbolt no longer fits into its slot. For a while we could force it and get by with some aggresive key work, but this morning saw the end of those shenanigans. The deadbolt refused to work, we were late, and finally had to turn the knob lock and call it good.

Obviously, something had to be done.

So after some drinks at Herkimer with the Caveman, I came home and decided a little work with the dremel was needed to expand the metal slot for the deadbolt – 5 minutes work, tops. So I changed the bit to a good metal cutting one, headed out, and sure enough the lock was working in no time. Happy with my work, I stepped outside for one more test – what the… this handle should be turning… no problem, I’ll just use the remote to open the door… wait, the remotes are in our cars… which are in the garage… which is now totally securely locked!!!

So what followed was the second consecutive night of the comedic stylings of Nate in a panic – "let’s try this old garage door opener, I think it might work." "Wait, it needs batteries!" "They’re dead and a crazy size, no go, but I can stack some AAs together!" "Ok, that’s the right voltage, why isn’t this working?" "Crap!" "Karen, can you find the code for the (broken) keypad?" "Ok, let’s try it." "That battery’s dead too??" "Ok, I’ll hold this 9V battery together with these two AAs." "Hey, it’s lighting up! Enter the code using these keys to scrape the missing terminals!" "Shit, that code’s too many digits, must be a part number scratched in a margin!" "Ok, one more try with the old remote!" "Crap!" "Karen, want to walk Bruno while I try some percussive maintenance on the door?"

In the end it didn’t even take much. I’ll leave out the details so all the criminals reading this blog won’t know how to break into our garage (although now that the deadbolt’s working, the point is moot. Solid, baby, solid.), but it wasn’t as bad as it could have been. We’re in and all seems well, but… damn, where are the backup plans when you need them? Even now, I can tell I’m not going to make a backup plan. "Self, that won’t happen again," I’m saying. Perfect.

Stay tuned for more fun when I tackle the car door. You know you can’t wait.

Odd phenomenon

Posted by Nate in Home Improvements.
Wednesday, November 30th, 2005 at 9:04 pm


There seems to be a direct relationship between the amount of light in a room and the amount of dirt in the room – that is, the more light, the more dirt. Some would argue that the dirt was already there, but empirical evidence at this point leads me to believe that the extra light somehow created the dirt. Stranger things have happened.

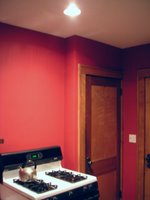
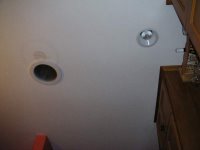
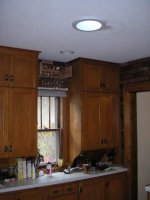
But as you can see from the pictures, good news! I finally got the last (planned) recessed light in place, a Halo H27RICT (Remodel Insulation Contact air-Tight). It was a struggle – the plaster and lath once again put up a fight and the wire I’d left in place was just 6" too short. Crap. But I got it all in place, fired it up, and stood back in awe of how amazingly dirty our kitchen had gotten. Maybe these lights weren’t such a good idea… (just kidding)

Anyway, isn’t that wall just crying out for something? I’m thinking some floating shelves, hopefully ones that will match the existing cabinets. That oughta keep me busy… (after I finish the insulation work in the attic and do all the paint touchup)

Paint update

Posted by Nate in Home Improvements, The Blog.
Thursday, November 24th, 2005 at 12:19 pm


I got the tape off the walls pretty cleanly Wednesday morning. I did end up using an exacto knife to help – I was having almost the opposite problem as Tuesday night, the tape was tearing because the paint was sticking so well to the wall and tape. But that ended up being easier to deal with and created very few spots needing touchup.

In response to the comments on the last post: Yeah, I think I knew I should be taking the tape off between coats but that really seemed like a huge pain because of all the edges involved… But now there’s a different pain, so maybe it would have been worth it.

I think if I had to do it over again I would leave the tape on like this time but paint the edges with an edging brush and try to keep the paint off the tape as much as I could. That’s really where the issue was, too much paint bridging between the wall and the tape…

As for images in the RSS, I’ll have to dig in a bit and see – it’s a bug in Blogger or Feedburner if they’re not showing up. Or your aggregator? Weird.

Son of a…

Posted by Nate in Home Improvements.
Tuesday, November 22nd, 2005 at 9:30 pm


So there’s the awesome red. It’s really hard to get the full effect from that picture, it’s actually much cooler in person. Really "dramatic," although I hate to use that word in talking about a space or physical feature…

I wasn’t going to post – I have a million things I need to do before we leave tomorrow – but I wanted to show off the color and bitch about the tape. That wad of blue tape on the right side? That about sums up how I feel about it. See, it’s sticking to the paint a bit harder than I’d like, to the point of pulling up little edges as I start to take it off. And it’s a clean break that it’s peeling up, so it looks like if I tried I could peel off everything I’ve done including the primer. Which means… maybe nothing, but maybe that I screwed up and somehow should have prepped the original surface better? Has it not bonded well, or does it just need time? I don’t know. I’ve stopped messing for the evening since my current best hope is that I’m maybe trying to take the tape off too soon and the paint is too soft. That’s definitely possible, but tomorrow morning is the last chance I’ll get to take it off – the tape is rated for about a week of contact before it starts to permanently stick (to the wood trim), so I can’t leave it while we’re out of town.

Grr. So, I’m really happy with the color and the paint job itself is awesome. This latest development… not so awesome. No matter what tomorrow holds I’ve already got a good bit of really small annoying touchup work to do, and to blend in it’s going to need sanding. And from what I’ve read, you can’t / shouldn’t sand paint until it’s well and truly cured, which can be from 10 to 30(!!!) days! Son of a…

Kitchen update

Posted by Nate in Home Improvements.
Tuesday, November 22nd, 2005 at 11:39 am


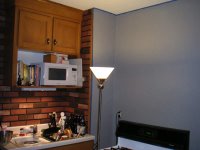
So enough with the geek posts! What’s happening to the kitchen?! Well, let me tell you: good things. Very good things. I was sick (still recovering, stupid tickly cough and stubby node) this last weekend, down and out Saturday, but together enough on Sunday to head with Karen to the Home Despot to buckle down and make some serious decisions about paint. And we did – not what we originally planned, but in the same family. (That grayish-blue on the walls is primer)

Why prime? The jury’s sort of out on this, since it was a previously painted surface we probably could have gotten away without primer, but I was a bit worried since from what I’d read kitchens can be tricky. Lots of gross buildup on the walls from cooking and general wear and tear can make it hard for paint to stick properly. So I washed the walls and opted for a primer, more specifically a gray primer. Despite a demonstration placard sitting right on the counter, the HD paint guys were sort of out of the loop on gray primer – and I didn’t know enough to insist on getting it mixed accurately. It’s close enough, though, and definitely helping. The final paint shows up WAY different on the few small spots that got missed with primer – the color over the primer is just awesome, rich and deep and warm.

So what is the color? Well, until I get a second and possibly third coat down, I’m not going to post any pictures, since it will change with each coat. I will say, however, that’s it’s bold. And looks great!!

One last picture showing the gas hookup to the stove. Nice and big copper loop so we were able to get good clearance from the wall without stressing any pipes.

Finalé for now

Posted by Nate in Home Improvements.
Monday, November 14th, 2005 at 11:00 pm


Talk about your anti-climaxes. Put in one last pretty intense day of work on Sunday and managed to "complete" (more later) the skylight project . . . after dark. So that’s what I saw when I came out of the attic, feeling all excited about finishing: a dark hole in the ceiling. I don’t even have the electrical light kit, so there’s no way to light it up at night right now… (I want to see what the kitchen looks like with the second recessed light before I decide if we need the light kit)

So, yeah, not as cool as I’d hoped – at least at night. This morning, however, it was giving strong hints of its future coolness, but the weather’s been crazy overcast all day and while it’s doing an impressive job with the light that’s outside there’s just not enough there to make a huge difference inside. And of course it’s practically dark when I get home from work, so the bottom line is we’ll have to wait to see how bright it gets. All signs point to awesome.

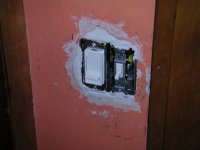
Speaking of awesome, I was also able to finish and close up all the wiring yesterday. I had to cut the existing 3/4" metal conduit with my dremel to make room for the skylight tube, so I routed it into a new junction box instead of using the kitchen light fixture like it used to. Also added a grounding wire to that box – although as I said before none of the existing kitchen / half-story wiring even has a ground. But by adding it to the junction box I can use it if/when I add the light kit to the skylight, which will make me happier since it’s theoretically nearer to the elements. The rest of the wiring was the first part of the project that went exactly how I’d planned, which was nice for a change. Since that picture of the switch I’ve sanded, re-patched, re-sanded, and closed up the box.

So what’s left? Well, in the first picture you can see the first round of plaster patching, darker since it’s still wet. You can also see a ring of dirt in a circle around where the old fixture used to be – really not sure of the physics of that, but somehow there’s a noticeable deposit there… Since that picture I’ve added another layer of plaster to match the level of the ceiling, it will need one more round of work to match the texture. I also want to clean / repaint the dirt ring. And I noticed there was a little light bleed around the ring of the skylight since I wasn’t able to make a perfect circle in the existing plaster, but I’m not sure how to address that yet… There seems to be some air leakage in the outer rim, too – something like Great Stuff might fix both issues, but it can’t be so permanently bonding, in case anything ever needs to move.

Oh, and paint. I finally hit a section of the wall with that "Pottery Red" we thought we liked way back when, we’ll see what that looks like when it’s dry in the morning. Whew. Getting there, and for now a break until the next light arrives…

Asbestos free!

Posted by Nate in Home Improvements, Homeowners.
Monday, November 14th, 2005 at 10:22 am


So thursday at work I was reading up on plaster and recessed lighting installation, and came across a few posts about asbestos in plaster. Wha..? Further reading got me worried, apparently it was quite common to have asbestos in certain plaster mixes, and who knows what that insulation actually is? I mean, to me it looks like rock wool and shredded wood chips / shavings, but what the hell do I know? So I took in some samples on Friday, not cheap but worth it for peace of mind.

… which arrived today. 100% asbestos free! (at least in that part of the house, but that’s the only part I’ve been cutting up.) Kind of a relief – I did buy a super nice respirator with active filters which made a huge difference for the weekend work, and put a plastic sheet up to isolate the kitchen, but there was still dust in the air, and the heat was blowing stuff around, etc… Good news.