Caskerator
Posted by Nate in Day to Day, Homebrewing.
Friday, March 2nd, 2007 at 4:39 pm
 Got a snow day today (Karen will hopefully post about the huge snow storm we’ve been getting) which is awesome – gave me time to finish up the caskerator! (Still debating that name…) First shot is the saw hooked up to the shop vac, a super nice configuration that lets me do work indoors on crappy days like this.
  At right is the basic frame constructed. Essentially I built a frame with plywood and bracing to get the shape, then started slapping 2" foamular insulation on it.
 At left you can see the corner detail. I ended up just using wood glue to attach the foam to the plywood, seems plenty strong, and the interior bracing is good. The whole structure firms up a ton once the back foam is attached.
 Here’s me in my "project" shirt trying to figure out what’s next. Those playing along at home will notice the kegerator is in the laundry room now – I knew the caskerator piece would be big but as I got it framed I realized the whole thing would be better out of the now-fancy-ish basement.
 At right I’m cutting holes for the fans and an extra one on the left for gas and beer tubes to run. By sizing the holes under a bit I could attach the fan right to the foam for a good seal. My biggest concern in all of this, and a problem I didn’t solve until late in the project, was how to attach the caskerator and the kegenator.
  I was planning on just running a 4" piece of duct between them, but I couldn’t figure out how to seal it tightly and still account for the shift when things moved – I need to pull them off the wall to fill the CO2, adjust pressure, etc… Eventually I ended up with what you see at left – a built out 2" set of foam with some softer foam insulation attached. Also you can see the hacked thermostat unit that controls the fans.
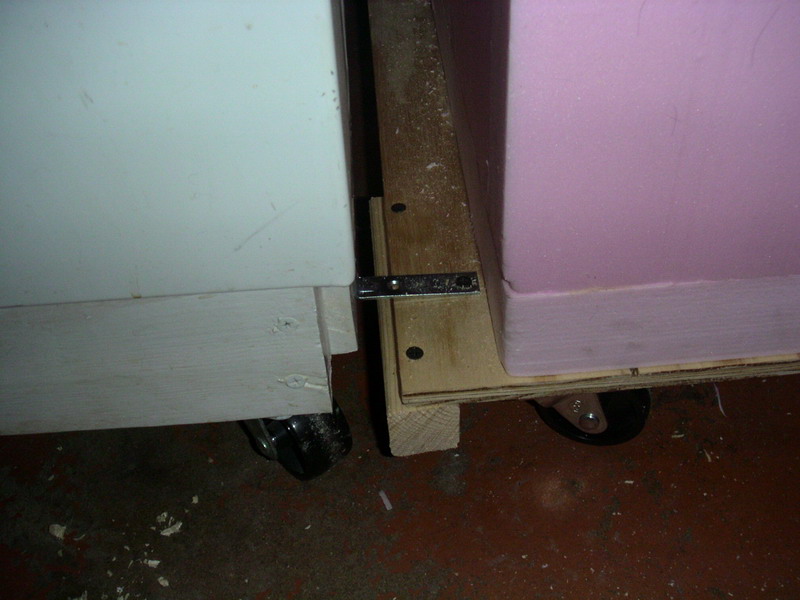 The basic idea is to take advantage of the angle in the floor. At right you can see I’ve anchored the caskerator to the kegerator at the base to act as a pivot point.
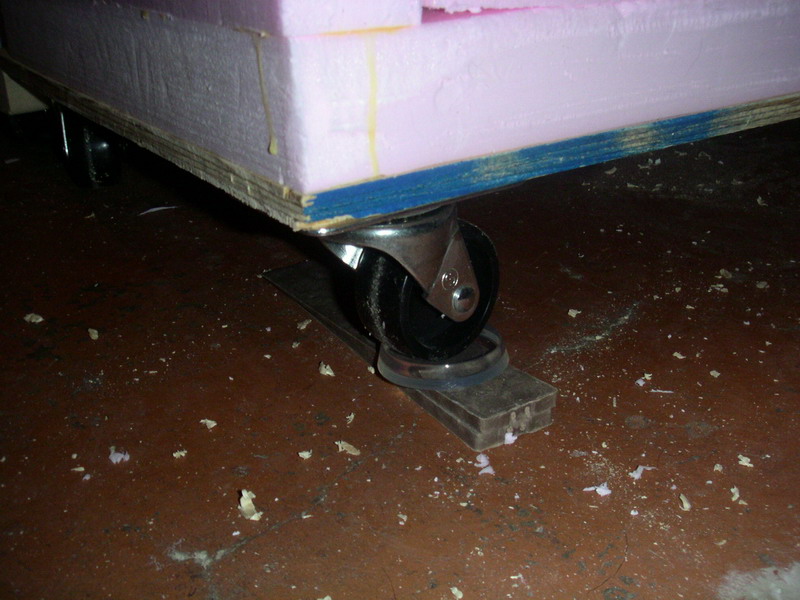 At left you can see how I’ve shoved little shims under the front wheels to push the soft foam into the kegerator. It ends up producing a really tight seal and still provides movement so nothing breaks when I move them.
 Here’s the kegs inside before closing it up – you can also just make out a wood and foam shaft I built to direct the air intake to up near the top. I wanted every connection into the kegerator to have the cold air on the downhill side so it didn’t fall into the caskerator and make it too cold. We’ll see how that works.
 Finally, success! I’ve only got a british bitter on tap right now, but I’ve got a Scottish 80 Shilling standing by as soon as a tap frees up!
Similar Posts:
- Non-wedding life ( July, 2007)
- Countdown ( December, 2007)
- Broomball! ( January, 2008)
- What to do? ( September, 2008)
- New Blog! ( March, 2007)

March 2nd, 2007 at 6:51 pm
Oh man, I would love a taste of the British bitter! Your “caskerator” looks pretty amazing. Good idea to move it all into the work room and leave your finished part for the visiting and sampling of the beers. So, is the pink color from the insulating foam?
March 2nd, 2007 at 7:27 pm
Obviously should be the Caskenator.
March 2nd, 2007 at 9:09 pm
Wow, never in my wildest dreams–or nightmares (?) did I ever envision that freezer that used to hold food for a family of 6 winding up like this–sure are getting the use out of it, that’s for sure. Who says recycling doesn’t work?
March 3rd, 2007 at 12:35 pm
Haha, I recognize CPU fans any day of the week! You just happened to have to spares lying around? And maybe you should paint that puppy or cover it. It kinda takes the manliness out of beer if it comes from a big pink box. ;)
March 5th, 2007 at 3:21 pm
I love it!! I don’t fully get it, but it looks cool and I won’t hide that that goes a long way in my book. Call me over when you’ve figured out how to attach the billiard table to it. It could be called the “sloparator” perhaps?
February 19th, 2008 at 9:19 am
Found your site in a google search looking at what homebrewers are doing. I’m looking to build a fermentation chamber similar to your Caskerator and wanted to know how it is doing. It is able to maintain steady temperature and are there any changes you would make? Any insights would be greatly appreciated.
Joel
February 19th, 2008 at 10:29 am
@Joel –
It’s doing great! Temps are holding steady using the modified home thermostat, and the oxidation hasn’t been too aggressive using the “buffer tank” (see this thread at NB). I’m currently finishing an ESB that I put on tap before Christmas, and it’s STILL delicious.
Thing to watch out for / do differently:
– Get as much distance below the keg to the faucet as you can. As the keg empties it ends up being a sloooow trickle, and a little extra height seems to make a difference (but not huge). I actually moved one tap onto the caskerator to test this and it seems to help.
– Keep those lines clean! Since the beer is warmer and potentially around for a month, I’ve noticed some off flavors creeping into the lines after a while. Seems to resolve after cleaning and the kegged beer seems fine somehow? Just some junk in the lines.
– Get a thermowell for doing lager ferments. It’s really nice to be able to basically drop the temperature probe into the center of the beer while it ferments, then you know exactly what you’re getting. Lager fermenting has been a great benefit of this project…
– Build a sub-chamber! My next project is going to be to partition a carboy-sized box on the bottom and fit it with another fan and maybe a “flap” to be able to hit ale fermenting temps in the summer. This needs some testing, but it’s on the radar so keep an eye on the blog.
– Plan your “door” better. I’m currently wedging the face on and off every time I want access to the inside. I had planned on cutting it a little smaller so it fit without wedging, but I haven’t been able to find magnetic tape in a layout I liked. I imagine something like they use on a refrigerator door would work nicely and come off without too much effort… I should look again.
Good luck and let me know how it goes!
February 29th, 2008 at 10:02 am
[…] Tomorrow is arts-and-crafts day at Jeff’s house! Joel will be building out a fermentation chamber for our new conical fermenters. The chamber will involve an insulated box that ducts cold air from our freezer, similar to the one built here by the Duo Team. […]
August 6th, 2011 at 7:33 pm
[…] I’m interested in building a 2nd fermentation chamber off of this one somewhat similar to this. The 2nd chamber could potentially be where we place beers for additional aging or for bottle/keg […]