Archive for November, 2005

Finalé for now

Posted by Nate in Home Improvements.
Monday, November 14th, 2005 at 11:00 pm


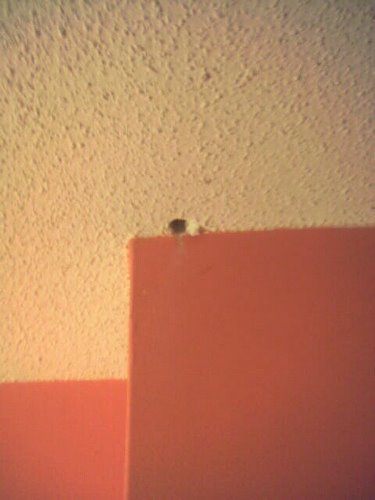
Talk about your anti-climaxes. Put in one last pretty intense day of work on Sunday and managed to "complete" (more later) the skylight project . . . after dark. So that’s what I saw when I came out of the attic, feeling all excited about finishing: a dark hole in the ceiling. I don’t even have the electrical light kit, so there’s no way to light it up at night right now… (I want to see what the kitchen looks like with the second recessed light before I decide if we need the light kit)

So, yeah, not as cool as I’d hoped – at least at night. This morning, however, it was giving strong hints of its future coolness, but the weather’s been crazy overcast all day and while it’s doing an impressive job with the light that’s outside there’s just not enough there to make a huge difference inside. And of course it’s practically dark when I get home from work, so the bottom line is we’ll have to wait to see how bright it gets. All signs point to awesome.

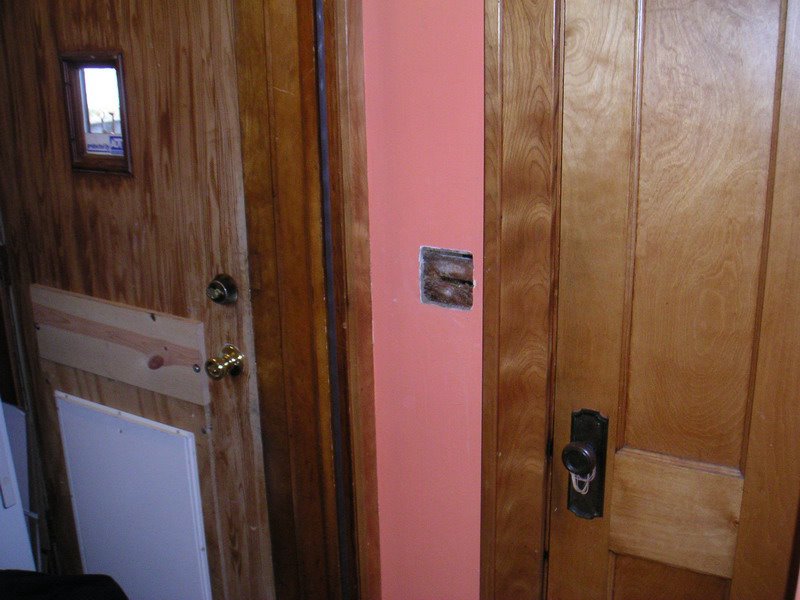
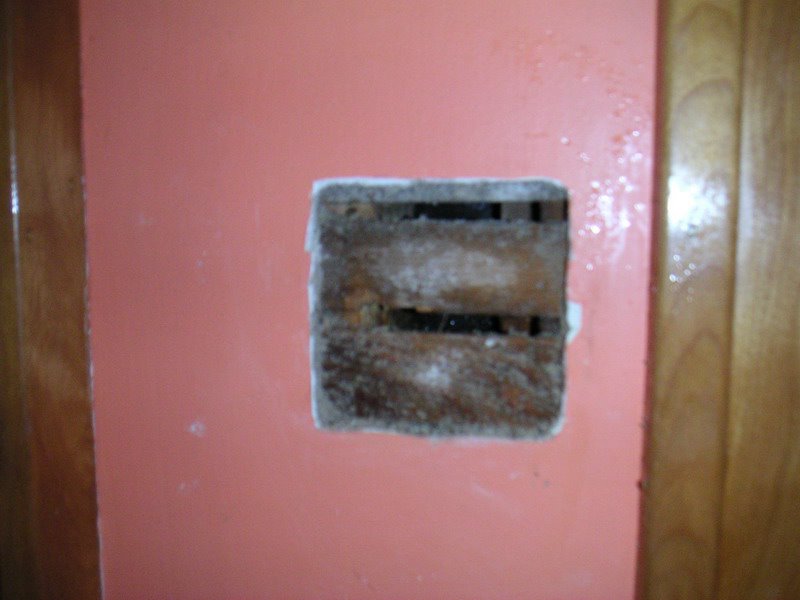
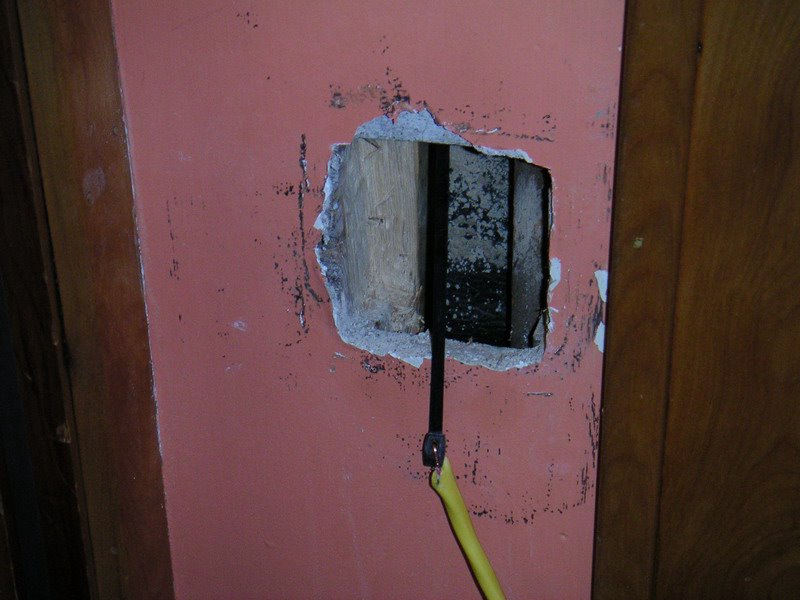
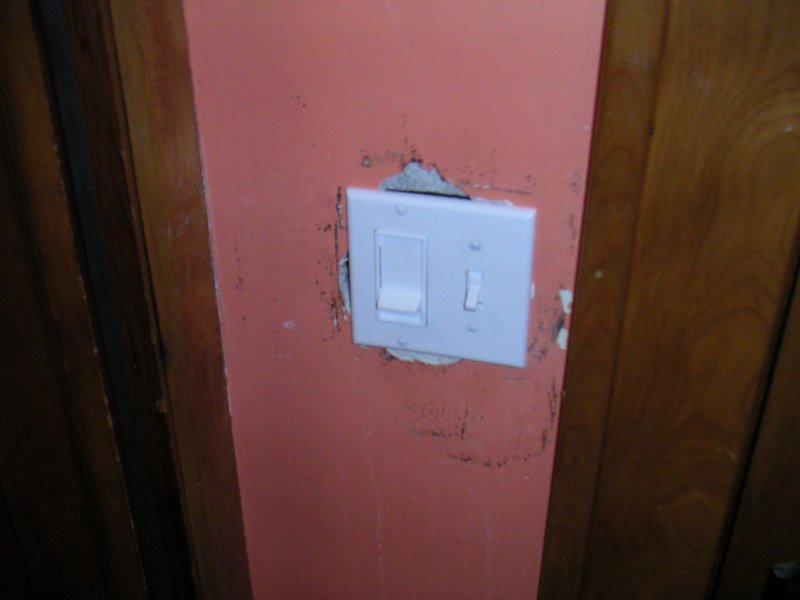
Speaking of awesome, I was also able to finish and close up all the wiring yesterday. I had to cut the existing 3/4" metal conduit with my dremel to make room for the skylight tube, so I routed it into a new junction box instead of using the kitchen light fixture like it used to. Also added a grounding wire to that box – although as I said before none of the existing kitchen / half-story wiring even has a ground. But by adding it to the junction box I can use it if/when I add the light kit to the skylight, which will make me happier since it’s theoretically nearer to the elements. The rest of the wiring was the first part of the project that went exactly how I’d planned, which was nice for a change. Since that picture of the switch I’ve sanded, re-patched, re-sanded, and closed up the box.

So what’s left? Well, in the first picture you can see the first round of plaster patching, darker since it’s still wet. You can also see a ring of dirt in a circle around where the old fixture used to be – really not sure of the physics of that, but somehow there’s a noticeable deposit there… Since that picture I’ve added another layer of plaster to match the level of the ceiling, it will need one more round of work to match the texture. I also want to clean / repaint the dirt ring. And I noticed there was a little light bleed around the ring of the skylight since I wasn’t able to make a perfect circle in the existing plaster, but I’m not sure how to address that yet… There seems to be some air leakage in the outer rim, too – something like Great Stuff might fix both issues, but it can’t be so permanently bonding, in case anything ever needs to move.

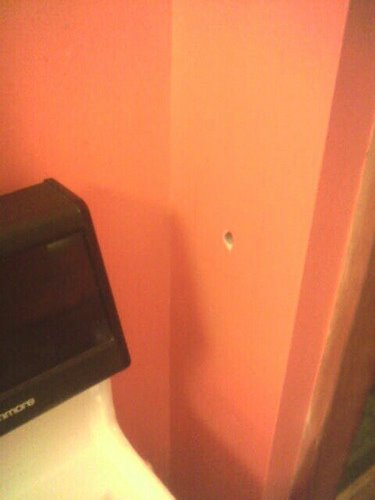
Oh, and paint. I finally hit a section of the wall with that "Pottery Red" we thought we liked way back when, we’ll see what that looks like when it’s dry in the morning. Whew. Getting there, and for now a break until the next light arrives…

Where’s Karen?

Posted by Nate in Day to Day.
Monday, November 14th, 2005 at 10:42 am


I’ve been remiss – all these posts make it sound like I’ve been working my tail off around the house and Karen’s just been… something. Well, it’s time to fill in the blanks on that "something":

  • Going crazy trying to study while Bruno keeps trying to play with her because I’m MIA in the attic
  • Cleaning our amazingly dirty bathroom including an awesome job on the sink and tub
  • Doing about a million loads of laundry – towels, bedsheets, Bruno’s bedcover, etc
  • Dealing with our last round of CSA veggies
  • Putting up with me making a huge mess in the kitchen that at several points threatened to take over the whole house
  • Did I mention study?

Basically, getting a ton done around the house. (oh, and studying.)

Asbestos free!

Posted by Nate in Home Improvements, Homeowners.
Monday, November 14th, 2005 at 10:22 am


So thursday at work I was reading up on plaster and recessed lighting installation, and came across a few posts about asbestos in plaster. Wha..? Further reading got me worried, apparently it was quite common to have asbestos in certain plaster mixes, and who knows what that insulation actually is? I mean, to me it looks like rock wool and shredded wood chips / shavings, but what the hell do I know? So I took in some samples on Friday, not cheap but worth it for peace of mind.

… which arrived today. 100% asbestos free! (at least in that part of the house, but that’s the only part I’ve been cutting up.) Kind of a relief – I did buy a super nice respirator with active filters which made a huge difference for the weekend work, and put a plastic sheet up to isolate the kitchen, but there was still dust in the air, and the heat was blowing stuff around, etc… Good news.

Vegetarian stress

Posted by Nate in Family.
Monday, November 14th, 2005 at 10:04 am


Looks like my sister has started a blog, and in her second post she touches on something I’ve noticed for a while now: vegetarians stressing out over menu options. Karen and I go to Town Hall all the time, and there are basically two vegetarian options: grilled cheese or black bean burger. Both delicious… Grilled cheese or black bean, cheese or bean…? I mean, come on! It’s not like we have to narrow down our choices, there are only two options!! Oh, the drama…

As you may imagine, the problem gets exponentially worse when there are more options: Karen almost has a meltdown at veggie-friendly places like French Meadow.

Project update the second

Posted by Nate in Home Improvements.
Saturday, November 12th, 2005 at 8:32 pm


In the last post you’ll remember I mentioned frustration and nervousness… Those mostly apply to the wiring section of the project – not the actual "which wire goes where?" part, but the "how the hell am I going to get a wire to a switch box in a reasonable location?" part. I thought I had it all figured out, and my plans were solid: get some fish tape, drill a hole into the wall from above, drill a hole in the wall, drop the tape, find it and attach the wire, pull and go! I knew it was possible I might hit some extra framing studs which could prove to be trouble, but I figured by coming in from the top it wouldn’t be too bad if I had to try a few places, since the hole wouldn’t show up. Wrong… In the first picture you can see the first hole I drilled – something went wrong after I measured carefully on the ceiling and then tried to map that location to the attic floor. Oops.

I actually had to fire a few more holes down before I stopped running into wood, but I finally got in the wall, and the fish tape went all the down to the floor! Great, now to just drill a hole in the wall and look for the tape! No go. The wall on the left is apparently almost solid wood, I must have found the single 1"x1" shaft when I dropped the tape. Crap. Two dud holes in the wall and ceiling so far, and no luck. That was all last night, and I went to bed super pissed off. Nothing was lining up, the easy solution I’d hoped for wasn’t going to work, and I didn’t know where to try next… I was getting nervous I was just ruining our kitchen, with no happy ending in sight.

Next morning I found a spot. I had to cut more floorboards in the attic, but I did it cleanly and can patch it up nicely afterwards. Not my favorite location for the lightswitch, but it will work. It has to, it’s the only option left! Of course it took a number of holes again, and one more unfortunate nick in the ceiling. Finally went out and bought a really long drill bit and punched in the exact spot I wanted.

This time, rather than cutting both the lath and the plaster at once, I used a utility knife to score the outline and then used a combination of water from a spray bottle and knife scraping to make the hole. Much cleaner and nicer, as you can see at left. You can also see the trouble ahead – behind the lath are two framing 2x4s, each sticking about 1/2 an inch into the space intended for the switch box. Uh oh. Actually it was sort of planned – I drilled a single hole before I started cutting and explored the space as best I could with a bent wire, so I knew they were there. I opted to split the difference rather than to cut the more central one almost all the way through. I think this way they’ll retain their integrity better, too. Also, that space between them? That’s the space I hit from above. Pretty small target. (pats self on back)

Fish tape dropped, 3 wire cable attached! Ready to pull! You can see I’ve used a jigsaw to cut the 2×4, and in the process of vibration lost a lot of extra plaster. Hmm. Good thing I won’t be doing that on the ceiling for the next two holes. Also, the saw picked up gunk from the roof yesterday and now left it spread all over the wall. Looks like some plaster repair is in my future… And painting, but we knew that.

As a final test, after connecting all the wires (up to code) and cramming them in the box, I put the faceplate on to make sure it will all work. While I’m confident (99.9%) in my wiring job, I don’t want to plaster it up yet since I think it will stick a bit to the box and on the off chance I need to change something… well, I’d rather not wreck it. So this is just a test – wired and ready to go, but the other end of the wire is just flopping in the attic. Hopefully one more push tomorrow will see the end of the wiring and completion of the skylight. Then it’s just waiting for the second recessed light to arrive (had to special order it, long story.)

Project Update

Posted by Nate in Home Improvements.
Saturday, November 12th, 2005 at 5:39 pm


I’ve been doing a lot of the "un-glamorous" work for this project, and it’s been going slowly, nervously, and at times very frustratingly. Let’s start from where we left off – the vent / light combo was in the ceiling and the light was hooked up but not to the final circuit. Time to install the vent cap in the roof and wrap that guy up… (at left, you can see my tool tub and the rope holding it to an attic vent. The black thing top left is the kitchen exhaust cap I’m installing).

I ended up squeezing this in on what looks like will be the very last day I could have done it – we’re getting some rain right now and possibly snow on Monday. With that forecast in mind, time was of the essence, and I decided to do the skylight cover at the same time.

For each hole I found the location inside the attic, poked a nail through the center, and used that centerpoint to draw a circle. You can see in the first shot I used a carpentry pencil for this – the graphite was immediately shaken off and disappeared when I started to saw… Luckily I’d bought a lumber crayon which was perfect. The second shot shows the two holes cut and waiting their respective attachments.

But who knew it was going to be such a hassle getting the flashing inserted between the shingles? Not me. Flat prybar here, little elbow grease there, done – so I thought. The theory was sound, but the day only got to about 65 degrees so they weren’t as flexible as I’d have liked. The nails were also hard to find in the level where I thought they should be. (They were probably nailed with an overpowered pneumatic nailgun tearing through the shingles?) My current thinking is that the roof isn’t that old, but it wasn’t installed as well as it could have been. Some of the shingles are either loose or were loose and slid slightly out of place – doesn’t seem to be a big issue at the moment, but I want to keep an eye on it.

But eventually I got it all in place – I wasn’t able to attach the very top screw into the skylight flashing, it was just too brittle to force. I got all the others in, though, and hit the hell out of it with roofing cement. Also got the vent cap in, no screws just roofing nails on that one. Finally attached the skylight dome – there’s a marked side to face North, that’s the side with some interesting grooved plastic prism-ish things in it. Presumably to reflect more light down the tube?

One final picture of the skylight tube, this one taken this morning. The messy roofing cement is because I’m a slob, overcaulked it, and then stepped on a corner of it. Oops.

Anyway, like I said it’s been raining today, but it had the decency to wait 24 hours from installation. I’ll head up in a bit to check things out, but I’m (fairly) confident it’s a solid job and won’t leak. Grr. Better not.

My brother’s career as a famous radio personality

Posted by Karen in Family.
Thursday, November 10th, 2005 at 1:33 pm


So I have to give a shout-out to my brother Steve. For anyone who doesn’t know, Steve is currently living in Ghana, West Africa and working at a refugee camp called Buduburam, and more specifically at a school for the deaf at the camp. This summer he was back in the States for a visit and did a couple of radio interviews. One of them was with Chicago Public Radio and the other was a station in southern California. The interview on Chicago Public Radio was aired during their "Worldview" program on October 27th and it is also archived on their website. It’s a great interview, and will hopefully increase support for the work he’s doing as well as awareness of the issues facing the millions of people living in refugee camps around the world. If you do listen to it, there is a story about fair trade coffee first – it’s a good story if you have the time, but if not you can fast forward to about 14:00 where Steve’s story starts. Steve also recently started his own blog to share stories and raise awareness and understanding. Look for a link to it from our blog soon. Way to go big brother!

Project: Vent / Recessed Light Combo, pt 2

Posted by Nate in Home Improvements.
Thursday, November 10th, 2005 at 9:41 am


Ok, so I’m jumping the gun a little bit with this "look, it’s finished!" shot, because it’s not finished – I just couldn’t resist. This morning was a rough one: woke up rubbing my eye at about 5:15, and realized something (insulation or plaster dust?) had worked its way pretty well in there. Ow. My eye was comfortable if it was open or if I looked down when it was closed, but it’s damn near impossible to keep your eye in one place when you’re falling back asleep. It kept drifting around and then waking me back up. Damn.

Tried to get it out with drops, no luck. Unfortunately Bruno heard the movement and decided it was probably time to get up, so despite my best efforts to lay quietly in bed so he would go back to sleep, he continued to bump around loudly in his crate and whimper occasionally. Got up, walked, trained, and fed him, and by that time Karen was up and I could jump back in the attic to get some more work done.

Basically the hole just needed some widening to let the housing for the light rest in it – our ceiling is plaster, and the wood lath proved to be a royal PITA to cut with a keyhole saw. (I may end up trying a fine bit and steady hand on the jigsaw for holes 2 and 3.) I also had to scrape down the plaster "keys" a bit to get a better fit on the housing, which in reading more about plaster I’m not sure was a good idea… But it seems really sturdy, in fact some of the lath around the hole was already free of the plaster and nothing moved at all, so I think I’m good. (Confused? I was too. Read up on historic plaster and repair.)

Once the fixture fit, I got to test my wiring job from last night. Popped in a bulb, held my breath, and flipped the switch – Fiat Lux! Now I "just" need to attach a duct for the vent, cut a hole in the roof, and attach the vent cap. And backfill insulation. And get some weatherstripping in there so air can only leak out the vent, which has a backflow prevention flap. And wedge the housing against the floorboards to prevent future rattle from the fan. … And then the skylight and the second light. But, progress!

Project: Vent / Recessed Light Combo

Posted by Nate in Home Improvements.
Wednesday, November 9th, 2005 at 10:44 pm


Well, as the kids say, "it’s on". Insulation has been rolled back, wires have been cut, circuits have been tested. There’s a hole in our ceiling. … and that’s as far as things have gotten so far. You know all those "installs in 2 hours!" claims you see on boxes in the home improvement store? Lies. Maybe 2 hours on a new, up-to-code house, but I’d say add an hour if it’s a house built in 1924, and then tack another one on for being your first major electrical / remodeling work. And then add one more if you have a dog. Doing the quick math, you can see that starting at 7 leaves me well short if I have to be quiet by 10:30 (grad student in the house).

How did it go? Pretty well, considering. Started by removing the existing fixture in the ceiling of the kitchen, and realizing there was one more conduit running into it that I couldn’t originally see. What the…? Charging ahead: I cut the wires I couldn’t unwrap, didn’t label them (did I mention it’s my first big project?), and managed to pull them up into the attic space. Finally traced the wires and felt pretty confident that the three from the hidden (bigger) conduit were 1) always hot, 2) switched hot, and 3) neutral. There was no ground. (did I mention not being up to code?) So the first (smaller) conduit was in fact providing power to the lighting fixtures in the half second story, through the kitchen lighting recess! Why some genius decided to handle this connection inside the kitchen box is beyond me. But I figured it out, and when I re-wired things at the end of the night, I was right. [pats self on back]

Anyway, the whole point of this drilling and cutting and wiring was to install a Nutone 744NT vent / recessed light combo. It’s not meant for use over a cooking area, but provides a handy method to determine if it’s far enough away – it is. (The skylight method I was considering before wouldn’t have been – probably would have worked, but trouble in the long run). The picture with the jigsaw shows the hole I cut in the "floorboards" in the attic crawlspace, you can see the more modern insulation rolled back on the edges and the old crazy combination of shredded something and "cotton" whatever. I have no idea what it is, but it’s all through the ceiling – which is good, considering we’re in MN. Keeping that in mind, all of the fixtures I’ve selected so far are rated IC – Insulation Contact. They’re allowed to be in the ceiling with insulation surrounding them – not packed tight, but there. Packed tight is asking for a fire, plus it’s not good insulation if it’s packed.

So that’s the update for now. As you can see, I couldn’t find safety goggles and am wearing Karen’s awesome sport shades with yellow tint. (Or I’m an alien: you decide.)

Cutest baby in the world

Posted by Karen in Friends.
Wednesday, November 9th, 2005 at 8:51 pm


I mean come on. If that doesn’t melt your heart then you just aren’t human.